


PID Temperature Controller UK: Understanding and Implementing Proportional-Integral-Derivative Control
Discover the UK's PID temperature control systems. Learn about the principles of PID temperature control, its components and how it is used in various industries. Discover how to implement and tune for maximum performance. )
I. I. Introduction
It is also important for ensuring efficiency and safety for household appliances. Among the most sophisticated and widely adopted methodologies for achieving this precision is the Proportional-Integral-Derivative (PID) control algorithm. The article explores PID temperature control systems in the UK. The article begins by explaining the basic principles that underpin PID controls. It then moves on to the cries the crucial process of tuning PID and methods to test and evaluate system performance. The article concludes by examining the UK's specific PID applications, benefits, and trends. This overvtical stage of project definition and specification. In detail, the selection and integration process of key hardware components is discussed. It is then explained how the PID algorithm can be implemented within the selected software platform. The article also examiniew is intended to provide readers with an in-depth understanding of PID controllers' design, operation, and implementation aspects. It also demonstrates its practical application using a step by step approach that applies to UK environments.
II. The PID Control Algorithm: Understanding it
PID's effectiveness and wide adoption are due to the integration of three different control actions that each address a specific aspect of control error. The three actions, Proportional Integral and Derivative, are integrated sequentially.
The proportional component (P) generates a signal output that is directly related to the magnitude of the current error signal. The error signal can be defined as the difference between the setpoint temperature intended and the temperature actually measured by the sensor. A larger error will result in a higher output signal. Its primary purpose is to correct the variable and move it closer to setpoint. Committing to proportional control alone can lead to a steady state error. The final temperature might not match the setpoint precisely due system delays and unchanging conditions.
Integral gain (Ki) determines how quickly the controller corrects this error. Integral gain (Ki), a measure of the speed at which the controller can correct this error, is determined by how quickly it gains. The integral term is used to calculate the total cumulative error. The integral term will increase (or decrease) the output signal if the error continues. This increases the influence of the actuator on pushing the process variable closer to the setpoint. The system will reach the setpoint temperature if the actuator is able to handle any opposition. Integral gain (Ki), which is the amount of time the controller reacts to error, determines the strength with which it responds. A higher Ki will result in an earlier elimination of the steady-state errors, while a smaller Ki results in more gradual responses.
It provides corrective actions based on how fast the error is changing. The derivative component anticipates deviations in the future by looking at how quickly an error increases or decreases. The derivative output term will generate a large corrective signal if the error rapidly increases or decreases. This helps to reduce oscillations and improve stability. It is especially beneficial to systems that are prone either to instability or overshooting due rapid changes.
This three-step process allows the PID to learn from previous errors and predict future ones. The result is a highly precise and stable temperature control. This algorithmic basis is essential for understanding the capabilities of PID controllers and their proper implementation in UK applications.
III. Parts of the PID temperature controller system
Each component of a functional PID controller system plays a distinct role in the loop. It is crucial to select and integrate these components in order to achieve the performance and reliability desired.
The common types are thermocouples (also known as RTDs), thermistors and thermistors. Each has its own characteristics. K-type thermocouples are robust and have a wide temperature range. They can be used in many UK industrial applications. RTDs (typically PT100 and PT1000) provide greater accuracy and stability at lower temperatures. They are therefore preferred in precision applications such as laboratory equipment, or the pharmaceutical industry within the UK. These thermometers are used for certain temperature ranges because of their high sensitivity. They are also relatively inexpensive. Sensor selection is influenced by factors such as the measurement range required, the accuracy specification, the cost effectiveness, the response time and the operational environment. To ensure accuracy and reliability, it may be important to adhere to standards published by British Standards Institution. Sensors often require signal conditioning such as amplifiers, circuits forLeng Jie DianBu Chang (cold-junction compensation) for thermocouples or interfaces, like Analog-to-Digital Converters, and digital communication protocols, e.g. I2C or SPI, for RTDs, and thermistors.
It is the controller that performs the PID calculations. Microcontrollers such as the Arduino (Uno, Nano, Mega, etc.) are often used in UK projects due to their cost-effectiveness, ease of use and extensive community support. Arduino IDE is a simple and user-friendly tool for uploading code. If you need more processing power or better connectivity, then the ESP32 with Bluetooth and Wi-Fi, or Raspberry pi, with its higher processing capacity, may be the best choice. Alternatively, PLCs, which are often used in UK industrial settings, can be utilized. They offer greater reliability and scalability. It depends on how complex the project is, what functionality you want, and your budget. It is important that the controller unit has sufficient input/output (I/O), to effectively interface with both sensor and actuator.
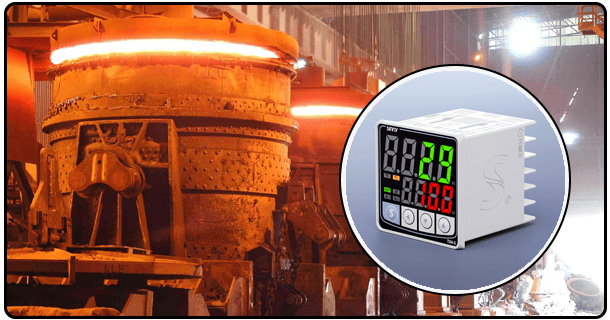
Actuator is the part that translates the command output from controller into physical actions that modify the temperature of the process. The most common temperature controller actuator is the heating element. This can be a resistive heating wire, heating film or cartridge heater. It generates heat by passing an electric current through it. A heating element is selected based on a number of factors, including the power required, the range of temperatures, and whether the heat will be transferred to a solid, liquid or air. Peltier modules that can be used to heat or cool in accordance with the direction of current flow, and fans which increase heat dissipation are options for cooling. Power supply and controller output must match the actuator's ability to handle power. The power supply supplies the electrical energy needed to safely power sensor, controller, and actuator. Power supply should provide correct voltage (5V, 12V or 24V), and enough current, to satisfy the power requirements of all components. For reliable, safe operation it is important to use connectors and wiring that are correctly installed. For sensors and digital circuits, grounding is crucial for reliable operation.
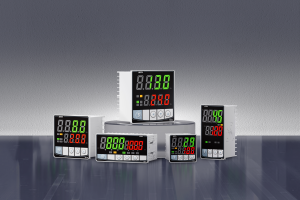
While not essential for the basic operation of the system, a user interface can improve the diagnostic and usability capabilities. The display will typically include an LCD or OLED screen to display the system status, current temperature, setpoint and error values. Potentiometers are used for manually adjusting parameters, such as tuning PID gains. Buttons can be used to set the setpoint and switch modes. Status indicators such as LEDs can indicate power, error condition, or actuator status. A simple system may operate without an interface, but a basic one is recommended to test and tune the system.
A suitable enclosure will protect hardware components against environmental elements such as dust, moisture and physical damage. This can contribute to system reliability and durability. It is important to choose an enclosure in the UK that suits the needs of your application.
IV. The Design and Implementation of Software
The next step is to implement the PID algorithm in the software chosen. It involves writing code to read sensor data, calculate the PID output and control the actuator. Software platforms have a significant impact on the development process.
Software platforms offer a wide range of options. Due to the Arduino's ease-of-use, the large support community, and the availability of libraries, microcontrollers such as the Arduino are very popular in DIY projects. The Arduino IDE simplifies the process of writing code and uploading it. Platforms like the ESP32, which has integrated Wi-Fi/Bluetooth and more computing power for complex projects (and general purpose computing), are also options. Python on a microcontroller or computer with the appropriate libraries, such as numpy , autotune , may be preferable for projects that require robustness and scaleability. Some projects may use PLC or commercial PID controller packages. It depends on how complex the project is, whether the programmer has experience with the platform and what functionality you need. It is important that the controller unit has sufficient input/output (I/O), to effectively interface with sensor and actuator.
Software design usually involves several modules. First, the module will read data from the sensor. If you are using a Arduino, this could involve reading analog values using ADC from a RTD or thermocouple. The code for digital sensors might read data using protocols such as I2C or SPI (e.g. an RTD sensor). Code must contain the appropriate calibration formulas for converting raw sensor data to a meaningful reading of temperature (e.g. degC or °F).
Implementation of the PID is at the core of software design. In the code structure, the parameters of the PID (Kp Ki Kd) are defined. These will be adjusted during the tuning stage. The algorithm determines the difference (the setpoint and measured temperature) to calculate the error. The code uses this error to calculate the contribution of the integral, derivative, and proportional terms. The proportional expression is calculated by Kp + error. Integral term is calculated by adding up the errors over time. This term can be prevented from growing too large using an integral wind-up technique. The most common method is to use a running sum, in which the error is added over time and then a maximum is set. A variable is used to store the previous error. The derivative term is used to estimate the rate of error change and it's calculated using Kd* (error – previous_error). This previous error can be stored as a variable.
This sum represents the output of the controller. The output signal must be mapped onto the actuator control signal.
The code for actuator control translates calculated output from the controller into a signal the actuator understands. The code, for example, uses the calculated output to determine the duty cycle of PWM to control the heating element using a MOSFET. This value is usually between 0 to 255 on an Arduino. The code will use the calculated output (often a value between 0 and 255 for an Arduino) to determine the state of the digital pin. This mapping function matches the output range of the controller to the requirements of the actuator.
The code for a user-interface must handle input (e.g. setting the setpoint via a button or potentiometer), and display relevant information on the display module (e.g. current temperature, setpoint error).
This sequence is repeated at a predetermined interval by the main control loop (e.g. using loop() on Arduino, or similar structures) in order to achieve a continuous feedback loop. Declare variables to hold sensor readings and other information, such as the setpoint value, error or previous error, the integral term calculation, derivative components, final output, etc. Modularity can be achieved by using functions (for example, one for reading the sensors, another for PID calculations, and yet another for an actuator code).
Initial stages of development are critical for testing and debugging. Print statements may be included in the code (for example, serial.print() for Arduino) that display sensor values, error numbers, and calculated results to allow manual tuning. In the final version, these would be removed or replaced with an appropriate display function.
V. V. Installation and Assembly of the System
After the selection of hardware components and writing the software code, the following phase is the physical assembly and setup for the operation. Attention to details is required to guarantee safety and proper functioning.
Connecting the components is the first step in assembling a system. Connecting the components begins with connecting the sensors. Sensors are typically connected to the analog input or digital pins of a controller. Controller output pins (e.g. analog pins for PWM or digital pins for relay switching) are connected to actuators. Power supply pins must be connected to controller power inputs, and sensor power needs. Important Safety Information: Double-check your connections before you apply power. Incorrect wiring can damage components. All connections should be insulated and secure. For sensors and digital circuits, grounding is essential for reliable operation.
The components should be installed in an enclosure that is suitable. It could be in the form of a project box, or even a setup that is custom designed. The mounting protects components against accidental contact or environmental conditions. It is important to place the controller in an area with adequate airflow. Cable ties and sleeves can be used to neatly manage wires.
Software code can be compiled on a computer or downloaded to the microcontroller. Code should be error-free. Simple tests involve connecting the three most important components: the controller, the sensor, and the actuator. They are then tested to verify basic functionality such as whether the controller can read the sensor or control the actuator.
VI. PID Tuning Process
The correct tuning of a PID controller is essential to achieve the performance you desire. The system can be unstable (excessive symphonies), slow to respond, or not reach the desired setpoint. Tuning is the process of finding values for Proportional Kp, Integral Ki and Derivative Kd parameters in order to optimize system behavior. This process is repeated iteratively, adjusting the parameters in response to system responses.
- Principles of PID temperature controller design: Implementation and tuning
- implementation, and testing of the PID Temperature Controller Project