


A Guide to the Schematic Diagram of PID Temperature Control
Mastering complex temperature profiles requires precise implementation. You will learn how to interpret schematic diagrams of PID temperature controls, which detail the connections between sensors, controllers and actuators. Understanding symbols and safety concerns, as well as steps to install and troubleshoot based on a schematic, is essential. This guide is for technicians and engineers who use PID to create precise thermal profiles.
1. Thermal Control Systems:
The Blueprint for UnderstandingThermal regulation is essential in many industrial, commercial, and scientific applications. Maintaining specific temperatures is essential for safety and to achieve desired results. This includes the exact settings in laboratory equipment, the climate-controlled environments used during food processing, and data centre temperature regulation. Basic temperature control techniques, like simple on/off switches, may be sufficient for certain scenarios. However, other processes require a greater degree of control and precision. This is where the Proportional-Integral-Derivative (PID) control algorithm comes into play. The PID controller is a major advancement in the field of temperature control. It offers sophisticated feedback controls to regulate variables such as temperature with incredible accuracy. The effectiveness of a PID system for temperature control depends not just on its intelligence, but also the physical implementation. The schematic wiring diagram is an essential tool in this situation. The schematic wiring diagram is a blueprint that shows the connections between the components and electrical systems. The schematic wiring diagram translates an abstract description of the controller's function, the sensor, the actuator and the power supply, into a visual representation. The visual aid will be crucial to the installation, operation and troubleshooting for any PID system. It is important to ensure that the components are connected correctly in accordance with the schematic for proper performance, operational safety and reliability.
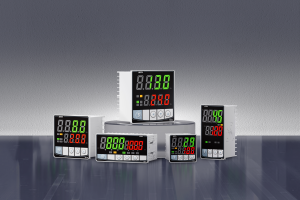
2. The Key Components in a PID System for Temperature Control
In order to understand and correctly interpret a wiring schematic, it is important that you are familiar with all the components of a PID system. The PID algorithm drives these components to work together in order to keep the temperature of the process at the desired setpoint. Primary components are the temperature sensor and temperature controller, as well as the actuator, power supply, control signal, and various signals.
The sensor forms the basis of the feedback system. The sole function of this sensor is to determine the temperature at which the control process is currently operating. This measurement's accuracy and reliability directly affect the controller's capability to make accurate adjustments. The thermocouple, which produces a voltage that is proportional to the temperature, as well as Resistance Temperature Detectors, or RTDs, are common types of temperature sensor. The schematic shows the specific requirements for each sensor type. Sensor output signals - voltages, currents, and digital signals - are then sent to the temperature control unit.
The Temperature Controller Unit is the brain of the system. The temperature controller unit receives input from the sensor and compares that to the setpoint temperature. This is done by using the PID algorithm. The calculation considers the present error (the current difference between setpoint temperature and measured temperature), the past errors (integral actions), and rate of change in the error. The controller then generates an output that instructs the actuator to act based on the results of this complex calculation. The PID controller has input terminals to receive the sensor signals, circuits that process the algorithm and output terminals which send the calculated signal.
actuator controls the temperature of the process by adjusting heat input and heat removal. Actuators include heaters that add heat, cooling fans and chillers which remove heat, solenoid vales (which regulate the flow of heating or cooling media like liquid or steam), or electric motors which control a variable. Actuators receive the signal and react accordingly. This influences the temperature of the process. The controller output capability must be matched with the type of actuator and the specific requirements for control (e.g. voltage, current or signal types).
The Power Supply supplies the electrical energy required to run the controller and, in many cases, the actuator. The power supply converts mains voltage or other sources of electricity into stable voltages, currents and electronic components required for the controller. It will show the connections for power to the controller, such as the positive and negative terminals (often labeled GND and V-), and, where applicable, any power connection required for the actuator. The system will not operate properly if the wiring is incorrect.
Control signals is the term used to describe the informational pathways and electrical connections that are utilized by the components. Primary control signals are the sensor output, power connection, and controller control signal. This schematic will show the signal type (e.g. analog voltage/current or digital communication like Modbus, RS485, Ethernet), and specific connection points for each signal.
3. Use of Schematic Wiring Diagrams: What are the Benefits?
Schematic wiring schematics are used in the field of temperature control, PID systems and other electrical systems. They are primarily used to create a simple, clear and standardized visual representation of an electrical circuit. The visual representation of the technical specification's functional relationships is translated into a layout that makes complex systems more understandable. These diagrams have many benefits.
Installation is one of the immediate benefits. Schematic diagrams are a great guide that show exactly how wires attach to terminals. It reduces the possibility of expensive mistakes and system failure due to wiring errors. The schematic helps technicians assemble the control system correctly by providing a visual representation of intended connections.
Schematic diagrams can also be used to troubleshoot . The diagram can be used to diagnose a problem when a system does not operate according to expectations. The technician can follow the path of the signal from the input sensor, via the controller to the actuator and confirm that the connections are in line with the schematic, as well as that the components function within the expected parameters. The debugging is more effective with this systematic approach.
Another important benefit is ensuring safety. Schematic diagrams distinguish between the high-voltage circuits of power and lower-voltage circuits for control signals. It is important to make this distinction for the safety of handling and installation. Diagrams also often highlight the importance of grounding connections for sensor accuracy, especially for thermocouples that require cold junction compensation, and for overall system safety. The diagram helps implement safety measures such as fuse selection, grounding, and high-voltage circuits by clearly showing the circuit paths.
Finally, the schematic diagrams encourage standardization. The schematic diagrams provide technicians of all levels with an easy-to-understand visual and a language that they can understand. Standardization of installation and maintenance procedures across systems and locations ensures uniformity. This document is also a valuable reference for any future upgrades or modifications.
4. The Schematic Diagram: Reading and Understanding It
Anyone involved with the installation, maintenance or troubleshooting electrical systems, PID temperature controls, will need to be able to understand and read schematic diagrams. Although diagrams can vary in their complexity, there are certain conventions and principles that allow for effective understanding.
is a key part of understanding a schematic. Every component or connection point has a standard symbol. A circle may represent a connection or terminal point. A triangle could represent a sensing unit. The first step to translating visual information is understanding these symbols. The diagram is usually accompanied by a legend that explains the symbols. This makes it easier for the reader to grasp the information.
Understanding the flow is another important factor. The wires usually follow a specific path, starting at the source of power, passing through the various components and ending back at the source. This path can help you visualize how the system works. This allows you to visualize how the signal from the sensor travels to and through the controller. You can also see how this controller generates outputs and processes the information. It is important to have a holistic perspective for installation as well as troubleshooting.
should also read any legends and notes that are associated with a schematic diagram. Diagrams contain notes which provide important information that cannot be conveyed solely by symbols. These notes may include information about specific terminals or power ratings. They could also contain maximum voltage or current limits or instructions for special connections. Neglecting these notes could lead to wrong wiring or system failure.
It is important to understand the logic that the connections represent. It should show how PID algorithms and sequences interact with components using the connections defined. It should, for example, show the input sensor, the output calculated based on error signals, and the output driving the actuator in the desired direction.
5. Schematic wiring diagram for the Basic PID temperature controller
Schematic wiring diagrams for basic PID systems provide a visual summary of all the connections needed to operate. A basic wiring diagram can illustrate the flow of power and signals, even though real-world schematics are more complicated. We'll break down some of the connections that are shown on a typical diagram.
Overview of the Diagram might show a layout in general, which shows the major blocks that represent the sensor, controller, actuator and power supply. Connecting lines indicate the signal path. It is not detailed but gives you a good overview.
Diagrams are more informative when they show the breakdown. First, the Sensor is connected. This schematic shows how to connect the temperature sensor with the input section of the controller. The schematic may include specific connections or terminals labeled with the type of sensor (e.g. T for thermocouple and RTD specifying range and type). This may also include any connections required for signal conditioning or grounding circuits.
The connections for power supplies will be shown next. This diagram shows how to power the internal circuitry of the controller. The diagram will show the connections made to an electrical source. The controller's voltage ranges and current ranges are often shown on the diagram. The diagram will show the power connection of the actuator if it requires its own power source (common with heating elements). This shows that the output of the controller is and not.
Controller output connections play a critical role. This diagram shows how the controller calculates PID and generates a control signal that is sent to the actuator. This might include a connection between the input terminal of an actuator and a voltage analog output, such as 0-10V, 4-20mA, etc. Digital controllers may have connections to digital outputs, such as RS485, Ethernet, which indicate a new type of communication. Diagrams should show how the signals travel from the output of the controller to the input of the actuator.
Grounding Connections is essential. This diagram shows the route to the reference ground point. It could be that there is a terminal dedicated to the sensor (important, for example for thermocouples using cold junction compensation), and another for the ground of the controller or actuator. This diagram must clearly indicate how the grounds are connected.
Real-world applications may include variations or additional elements. These may be shown in a comprehensive diagram, or they could be separated into different diagrams for each configuration.
The schematic for controllers with analog outputs will show the wiring of 0-10V and 4-20mA. The schematic will show the wiring from the output terminal of the controller to the input of the actuator, often showing compatibility with actuator control requirements.
digital controllers that use Modbus or Profibus communication protocols as well as Ethernet and other communication protocol will be shown the wiring of these digital lines. Diagrams will show the connections for communication buses (e.g. RS485 Terminals, Ethernet Port). The integration ofShang Wei Ji and more sophisticated control strategies is possible.
Outputs for alarm outputs are frequently included. The diagram will display the connections of alarm contacts. The system can be monitored and trigger actions depending on the status.
Additional Inputs/Outputs could be displayed. Diagrams can show connections to features such as inputs, status indicators or manual overrides. These features have been connected to allow for flexibility and improved control.
Advanced features may be shown in separate diagrams and notes. It could be for specific features such as temperature ramping or hysteresis, or actuators like solid state relays and contactors that have different wiring needs.
6. The Safety of Wiring
The wiring of a PID system for temperature control is more than just an electrical job. It is also a crucial operation which requires strict compliance with safety protocols. Schematic diagrams are a key tool to ensure that safety issues are addressed correctly.
Differentiating high- and low-voltage circuits is a fundamental safety issue. This diagram helps visually differentiate between high voltage power circuits, such as the connections for the actuator and controller power sources, and lower voltage control circuits, like the sensor signal lines and analog/digital communications. It is important to differentiate between the two types of circuits for safe installation, proper insulation and termination.
The importance of proper grounding cannot be overstated. It is important that the schematic shows clearly where grounding connections are made. The grounding of the thermocouple sensor is important for accuracy, as well as for cold junction compensation. Diagrams should show the route to grounding points.
Circuit protection and fuses are essential for safety. It is important to indicate where the fuses and circuit breakers are located, especially for power circuits. The circuit breaker or fuse will protect against an overcurrent condition, which could damage the actuator, controller, and power supply.
Diagrams may show isolation, particularly for systems or digital controllers with multiple power domains. Diagrams may show opto-isolation which protects the controller and sensor from high voltages coming from actuators or power supplies. The diagrams must clearly show the components of isolation and their connections.
7. How to Install Wiring Properly
The next step, using the diagram as a guide, is to implement the wiring in accordance with the plan. The diagram details are used to guide practical steps.
A pre-wiring may be necessary. It involves choosing the right cables, connectors and terminations (e.g. DIN rail terminals or screw terminals) based on expected voltages and currents specified in diagrams and datasheets.
It is important to ensure that the sensor connects correctly. This diagram illustrates how to connect the sensor input with the controller. The next step is to ensure the proper termination of the cable (e.g. shielded cables that are noise-isolating) and connect the terminals. This diagram illustrates the points of connection for the signal line.
Power connection is the secure connection to the operational power supply of the controller (as indicated for both the controller and the actuator). Diagram showing the terminals and connection.
In the diagram, you can see how to connect signal control with. The controller output is connected to the actuator's input. Diagram showing the terminals, and required wiring, depending on actuator type (analog voltage/current or digital) and output signal.
The connection is used to establish a ground reference that can be relied upon (as illustrated for the actuator, sensor and controller). Diagrams show the exact connections required.
Despite a schematic that is clear, problems can still occur during or following installation. Diagrams are a useful tool to troubleshoot these issues. Diagrams can help identify possible wiring mistakes. Diagrams should be used to guide you through the process of verification.
No response is a common problem. This schematic can be used to verify sensor connections, power connection and controller status.
When sensors are not reading correctly, it is important to check the sensor calibration and connection (as in the figure).
An unstable output may indicate noise, incorrect configuration or sensor drift. This diagram can help identify which path leads to controller inputs and outputs.
Actuator failure is caused by a malfunction of the control signals (shown for the actuator connections) as well as the power supply to the actuator (if it's separate).
It is important to identify the connections that are not working.
The diagram can be used to identify incorrect connections.
Missing connections can be identified.
Conclusion: Schematic Diagrams are Essential.
The schematic wiring diagram, in conclusion is more than a simple technical illustration. It is an essential tool to implement PID temperature controls systems successfully. The schematic wiring diagram provides all the information needed for installation, maintenance, and troubleshooting. The clear visual presentation translates an abstract description of the function into a guide that is practical. The schematic allows for precise implementation by accurately showing the connections between sensor, controller and actuator. It is important to achieve the correct temperature profile and ensure operational safety. The first step to building a reliable and robust temperature control system is selecting a controller that has a schematic diagram with accuracy and clarity. It is important to follow the diagram correctly in order to achieve precise temperatures, ensure safety and optimize process efficiency. Anyone working with temperature control systems that use PIDs will find the schematic wiring diagram to be a valuable resource.
`
- Setting Up a PID Temperature Controller for Precise Control
- PID temperature controllers with profiles: mastering temperatures profiles for complex processes