


PID Temperature control - Detailed guide
Meta title: PID Temperature control: Step 7, Configuration, Tuning and Best Practices Description Meta: PID Temperature control with Siemens Step 7. The comprehensive guide includes setup, configuration and tuning for industrial temperature regulation.
1. Introduction
Outline Overview: overview of temperature control and its role in PID.
Content:
In many industrial applications and lab settings, precision temperature control is essential.
Siemens Step 7 software is a popular programming tool for Siemens Programmable Logic Controllers. The software provides powerful tools to implement and configure various control strategies including temperature PID control. Automation engineers and technicians must therefore master the tuning and configuration of PID controllers in the Step 7 environment. This guide will provide you with a step-by-step, comprehensive explanation on how to use Siemens Step 7 to implement PID Temperature Control. It covers everything from the initial setup through to tuning and troubleshooting. The underlying concepts will be explained in a clear and easy-to-understand language to ensure that those who wish to improve their PLC programing capabilities can easily understand them.
1. Understanding PID Control
Overview: Explains the components P, I and D, as well as key parameters and applications.
Content:
PID controls are based on calculating the error as the difference of a setpoint desired (the target) and an actual process variable (temperature). The error signal will then be processed using three different mathematical components, namely Proportional Integral and Derivative. It is important to understand how these mathematical components affect the control actions.
Proportional (P). generates a result that is directly proportional with the error. The output changes more when the error is larger. Although P control reduces error, the system will often remain off-target and not reach its exact setpoint. Proportional Gain Kp is the determining factor in the sensitivity of P responses. The higher the Kp, the stronger is the response to errors. This could lead to a faster adjustment but can also increase oscillation risk.
The Integral term (I) addresses the steady state offset inherent to pure P control. This term integrates the value of the cumulative error. This accumulated error is used to adjust the output. Integral Time Constant Ti determines the speed of integral actions. The integral time constant (Ti) is a value that determines how quickly the integral action responds to errors.
The derivative (D) predicts future mistakes by considering the rate at which the error is changing. The term measures the rate at which an error changes and takes corrective actions proportional to that change. This predictive ability is influenced by the Derivative Time Constant. The derivative effect is enhanced by a higher Td, which helps to reduce oscillations, improve stability and dampen processes that have high inertia. Derivative action is sensitive to measurement noise, which can cause erratic behavior if it's not tuned carefully.
The PID equation combines these three elements:
Output = Kp * (Error + (1/Ti) * Error dt + Kd * d(Error)/dt)
Where:
The output represents the signal that is sent to an actuator, such as a heating element.
error is defined as the difference between setpoint (temperature) and process variable.
Kp represents the proportional gain.
The integral time constant is.
Kd represents the derivative gain.
Error Dt is the integral error in time.
d (Error)/dt is the change rate in the error.
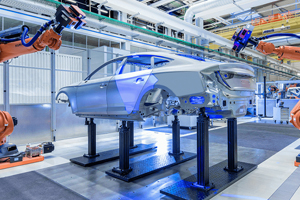
PID controls are used in a variety of applications, including heating furnaces and ovens. They can also be applied to water heaters, chemical reactions, or refrigeration systems. The ability of PID to deliver robust, accurate and stable control is essential in industrial automation.
3. Installing the system
Overview: Description and installation of the hardware required (sensors and actuators) as well as initial software configuration (Step 7 Installation) and physical connection.
Content:
A physical system is required before configuring PID within Step 7 software. Hardware components include, for example, a temperature sensing device, an actuator that can affect the temperature and a Siemens PLC which executes the logic. The choice of sensors (e.g. thermocouple or RTD) as well as actuators (e.g. heating element, cooling fans) depends on the application.
This sensor converts the physical temperature measurement to an electrical signal the PLC is able to process. The signal is often conditioned (amplified, filtered) to fit within the range that the PLC Analog Input module accepts. The Analog Output module of the PLC sends the control signal that is used to regulate the heat or cool action. This signal can vary between 0 to 10 volts and 4 to 20 milliamps.
It is the Programmable Logic Controller that controls the system. The PLC receives the conditioned signal of the temperature sensor through the AI module. It then executes a PID algorithm based upon the setpoint value and measured value and sends a corresponding signal to the actuator via the AO Module. Power is required for the PLC and sensors as well as actuators.
The Siemens Step 7 software environment is required to be installed onto a computer. The engineers can then create, configure and download their control programs to the PLC hardware. Step 7 contains the tools and blocks needed to program PLC logic. This includes the blocks required for PID control. Step 7 must be installed in the right version for the hardware. The software is then used to configure the modules and create the control application.
Physical connection is the final phase of initial setup. The cables must run from the PLC AI module to the actuator, as well as between the PLC AO module. To reduce noise that could interfere with accuracy, cables should have secure terminations and shielding, particularly for temperature sensors. All devices should also have their power connections made correctly, according to safety standards. The physical configuration is crucial, since it will form the foundation for the software configuration.
In Step 7, configure PID
Overview: Steps for creating a Step 7 Project, adding PID Blocks, configuring parameters (Kp Ki Kd Setpoint Input/Output) and setting up signal connections.
Content:
Siemens Step 7 provides a number of different ways to configure PID controls. The software's Function Blocks are the most important.
In Step 7, create a project. The first step is to create a new project in Step 7. This includes setting up the structure of the project, defining hardware configurations (specifying PLC models and modules connected like AI and AO), as well as creating symbols and variables for the program. The structured approach ensures that the logic of control is clear and helps to organise.
The next step would be to add PID blocks to your program. Siemens Step 7 provides PID blocks in its library. These are usually found on the menu labelled 'Function Blocks or Blocks. The PID algorithm is embodied in these blocks. Create a PID control block or an instance in the main program. The block must have inputs and out put connected. These will later be tied to actual process variables, and the setpoint.
The PID parameter configuration is an important step. In the parameters or properties window for the PID instance, the proportional gain (Kp), integral time constant (Ti), as well as the derivative time constant (Td) are typically set. These values have a major impact on the performance of the controller. Ziegler Nichols is a common method for determining initial values of Kp, Kd, and Ki. This involves measuring the critical oscillation period and gain from the controller and calculating the Kp, Kd, and Ki values. Starting values can also be based on the application or experience.
Setpoint (SP), the target temperature that must be maintained by the PID controller, should also be set. The setpoint is the target temperature the PID controller is aiming to achieve. Setpoints can either be defined as a constant in the programming or dynamically altered via HMI input (Human-Machine Interface), or by communication with another system.
The Process Variable input (PV), which is the temperature measured, should also be connected to the PID. The AI module is where this input comes from. It receives the sensor signals and converts them into numerical values within the PLC range.
The output (OUT) from the PID module must be connected to the AO Module. The output signal (often a numeric value) will be sent by the actuator to change the temperature of the process. This output range must match both the specifications and requirements of the AO Module. If the 'Auto-Tune" feature is available in the Step 7 blocks of the PID, it's important to set this up. This will automatically calculate the Kp, Kd, and Ki values based upon the dynamics of the process.
PID controller tuning
Outline An explanation of the Ziegler Nichols method and manual tuning techniques. Also, how to adjust Kp, Kd, and Ki for optimal performance.
Content:
The initial configuration of the PID parameters only represents the beginning; to achieve optimal performance, careful tuning is required. The Kp, Kd, and Ki values are adjusted to make sure the system is responsive to change, that it reaches its setpoint with accuracy, remains stable, without oscillations, and does not have steady state errors. The Ziegler Nichols method or manual tuning are the two main approaches.
The Ziegler Nichols method is a systematized empirical approach that requires a stable system. This process has two steps. First, determine the ultimate gain of the system (Ku), and then the ultimate period. The ultimate gain (Ku) is the maximum gain that the system will operate at without oscillation after a step-change. To find Ku and Pu, a very high value of Kp is chosen (the critical gain), and the system is manually adjusted until it oscillates with a consistent period (Pu). Ku is then equal to this critical gain, and Pu is the period of these oscillations.The goal is to achieve a response that is fast enough to correct deviations but not so fast that it causes oscillations. Once a reasonable Kp is found, the Integral action (Ki) is introduced and tuned to eliminate any steady-state error. Finally, the Derivative action (Kd) is added cautiously, primarily to dampen oscillations, improving stability without significantly slowing the response. This iterative process requires patience and careful observation of the system's behaviour, often using graphical trends displayed by the HMI or within Step 7.
Testing and Calibration
Outline: Running simulations in Step 7, practical testing with real hardware, and the importance of calibration for accuracy.
Content:
After configuring and tuning the PID controller within the Step 7 software, it is crucial to thoroughly test and calibrate the system to ensure it functions as intended and achieves the required level of accuracy.
Testing can initially be performed using simulation tools available within the Step 7 environment. Many PID blocks include simulation capabilities that allow you to test the control logic offline. You can apply simulated setpoint changes or load disturbances and observe the system's response on graphical trends displayed in the Step 7 Comfort or WinCC Comfort software. This simulation stage helps identify potential programming errors, verify the tuning parameters, and understand the system's behaviour before connecting live hardware. While simulation is valuable, it cannot fully replicate the dynamics and potential non-linearities of the real process.
The next critical step is practical testing with the actual hardware setup. Once the system is physically connected and the PLC is running the programmed control logic, you must observe its performance under real operating conditions. Apply the setpoint and observe how the temperature responds. Check for stability, overshoot, settling time (the time it takes for the temperature to remain within a specified range around the setpoint), and steady-state error. Introduce controlled disturbances, if possible, to see how the system recovers. Compare the actual response with the simulation results and make further fine-tuning adjustments to the PID parameters if necessary. This iterative testing and tuning process is vital to achieving reliable and effective temperature control.
Calibration is the final critical step, ensuring the accuracy of the measurement system.Accurate calibration guarantees that the PID controller is responding to the correct temperature values, leading to reliable control performance.
Troubleshooting and Maintenance
Outline: Common issues (instability, oscillation, slow response, offset) and their causes, regular maintenance tips, and safety considerations.

Even with careful configuration and tuning, PID temperature control systems can encounter issues. Recognising common problems and their potential causes is essential for effective troubleshooting. Troubleshooting often involves systematically checking the hardware, software configuration, and tuning parameters.
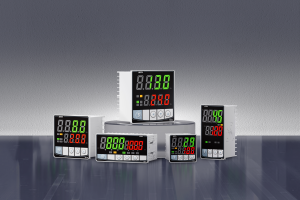
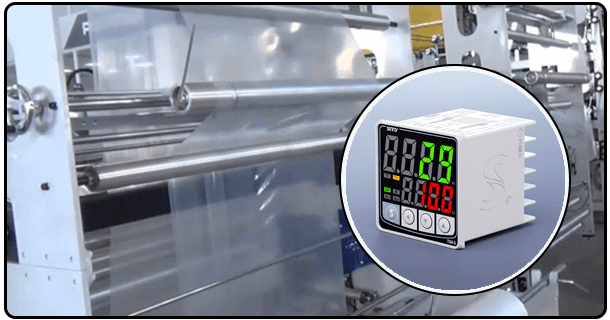
- Experiment with a PID controller to control temperature
- Understand Precise Thermal Regulating with Small PID Temperature Controls