


PID Temperature Controllers Manual: Comprehensive Guide for Operation and Implementation
I. Title Page
Title of the Manual: PID Temperature Control Manual for [your specific product name/model]
Manufacturer name & logo:
Manual Version/Revision Date: Version [e.g., 1.2], Date [e.g., 15 May 2024]
Safety Icon/Statement [Warning icon] Before installation and operation, read ALL safety information.
II. Table of contents
I. I. Introduction
A. A.
B. B.
C. Document Scope
D. Conventions used
II. II.
A. A.
B. B. Specific Safety Warnings
III. Getting Started / Installation
A. Depacking The Unit
B. B.
C. Site preparation
D. Installation Steps
E. First Power Up
IV. Operation and Control
A. A.
B. B. Basic Functions
C. Temperature setpoint
D. Understanding PID Parameters
E. Status Indicators
F. Alarms & Faults
V. Troubleshooting and Maintenance
A. A.
B. Problems that are common and how to troubleshoot them
What to do if you need Support?
VI. VI.
A. Electric Requirements
B. Temperature Range
Accuracy & Resolution
D. Control output
Sensor compatibility and connections
Size and weight
G. Environmental Requirements
H. Communication Interfaces
VII. Optional Advanced Features and Configuration
Setting A. Hysteresis
B. Ramp rate control
C. Data Logging Features
D. Communication Setting
Password protection
VIII. FAQs
IX. Warranty and Service Information
X. Appendices (Optional)
A. A.Detailed wiring diagrams
B. Pinout Diagrams
C. Export Declarations
D. Regulatory Compliance Information
III. III.
A. A.
B. B.
The primary audience for this manual are engineers, technicians and system integrators. They will be responsible for installing, configuring, operating and maintaining temperature control systems. This manual assumes that you have a good understanding of basic electrical concepts and temperature control. The instructions for use are clear and easy to follow, even by those with different levels of expertise.
C. Document Scope
D. Conventions used
To enhance understanding and clarity, this guide uses certain symbols and conventions. This is why it's important to become familiar with the conventions.
[Icon description]: The icons are used for highlighting important information or warnings. As an example, The [Warning Icon] indicates a possible hazard which requires immediate attention.
Bold text: To draw attention, key terms, component names and menu options are usually presented in bold.
Italic text: The italicization can be used to emphasize, Jiao Zhu labels, or denote variables.
[Abbreviations] The common abbreviations that are used in the manual will be defined on the first appearance (for example, PID AC DC V Hz degC).
References: The page numbers of other sections are placed in brackets following the reference (e.g. [See Section III.C]).
IV. Safety Information
B. B. Specific Safety Warnings
To alert the user to possible hazards, we have provided specific warnings:
! [Warning Icon] Hazard of High Voltage: Both the controller and any connected loads operate under high voltage. ([Specify voltage, for example, 220V AC]). High voltage may cause serious injury or even death. Installation, maintenance, and repair of the system should only be performed by qualified personnel.
! Warning Icon: Over-Temperature Danger: The controller or connected load can become very hot when in operation. To prevent burning, avoid contact with surfaces that are hot.
! Warning Icon: [Incorrect Wiring] An incorrect wiring could cause harm to the controller or the load. It can also create a safety hazard. Follow the wiring diagram in Section VI.
! [Warning icon] Short circuit: Before connecting the load to the controller, ensure that it is adequately insulated and has no short circuits. Short circuits can damage the controller or create fire hazards.
! [Warning icon] Emergency stop: If an emergency occurs, immediately disconnect the controller using [Specify the Emergency Stop Procedure (e.g. main power switch).
V. Getting Started / Installation
A. A.
Unpack all contents carefully after receiving [Your Specific Model/Name] PID temperature controller. Standard kits typically include the following:
1 x Main Controller Unit
One x temperature sensor ([Specify the Sensor Type e.g. K-type thermocouple]).
1 x Connecting cables ([Specify cable type and length]).
One User Manual
List any additional components (e.g. mounting hardware or screws)
Compare the content of the box with the list. Contact the distributor or manufacturer immediately if any items are missing or damaged.
B. B.
Gather the required tools and materials before you begin. You may require:
Screwdrivers
Wire strippers
Pliers
List any additional tools, such as a multimeter or crimping tool.
The appropriate wire gauge and type
List any additional materials required, for example, terminal blocks or enclosures.
C. C.
Select a locati0n that is suitable for the installation of the controller. Consider the following:
Accessibility The controller must be accessible to the operator for maintenance and programming.
Ventilation - Make sure the controller is ventilated properly to avoid overheating.
Environment Conditions: Do not expose the controller to excessive moisture, dust or vibration.
Electric Supply: Make sure that a 220V AC supply with a good grounding is nearby.
D. Installation Steps
Install the PID temperature controller [Your specific product name/model] by following these simple steps:
Mounting Controllers: You can mount the controller on either a DIN Rail [if applicable] (e.g. a wall enclosure) or an enclosure. Mount the controller securely using the mounting hardware provided.
Connecting Power: Connect power cables to designated terminals of the controller. Make sure the gauge of wire is suitable for the amount of current drawn by the load. As required, install the fuse of [Specify fuse ratings].
Connecting a Temperature Sensor. Connect the cable of the temperature sensor to the input terminals for the sensor on the controller. Make sure the cable is securely connected and that the sensor is correctly positioned to measure accurately the temperature of target medium.
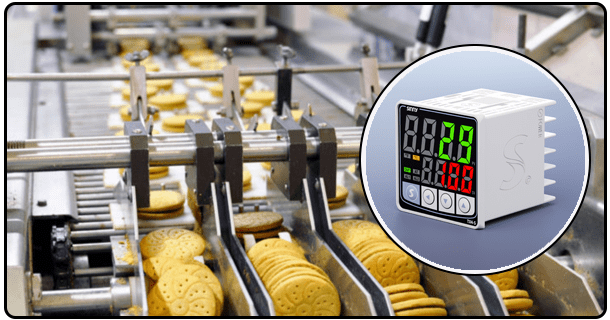
Connecting a controlled load: Disconnect any power from the heater or cooler. Connect the power cables of the controlled load to the output terminals designated on the controller. Check that the output of the controller is compatible with your load (e.g. Peltier, Peltier heating element).
E. E.
The controller should be powered on for the first use after completing installation:
Connect the power to the controller.
Watch for error messages and alarms.
Set the thermostat to the desired temperature using the settings in Section IV.B.
VI. Operation and Control
A. A.
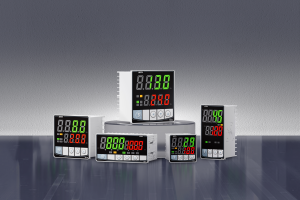
This PID Temperature Controller [Your Specific Model/Name] features an easy-to-use interface. Interface components include:
Display The display displays real-time data such as temperature, the setpoint and status indicators.
Buttons [Specify the number and type] of buttons are used for navigation through menus and options.
B. B. Basic Functions
You can operate your controller using the following functions:
On/Off Power: You can turn on or off the controller by using [Specify locati0n of power button and its function].
Display information: This display displays the temperature and setpoint of the unit, as well as the status (e.g. heating, cooling or standby).
Setting the Setpoint: You can adjust the temperature setpoint using [Specify the button function, for example, the "+" or "-" buttons]. Setpoint is the temperature target for the system.
C. C. Setting the temperature setpoint
Set the temperature desired setpoint by:
You can access the Setpoint Adjustment menu (refer Section IV.D to navigate through menus).
You can increase or decrease your setpoint by using the [Specify Button Function] button.
Verify the value of setpoint [please refer to section IV.D on confirmation procedures].
D. Understanding PID Parameters
The Proportional-Integral-Derivative (PID) control algorithm is used to regulate the temperature. Three key parameters include:
Proportional: The parameter controls the controller’s response to a current error. (The difference between setpoint temperature and actual temperature). Higher P values result in faster responses, but can also cause oscillations.
Integral: By accumulating past errors over time, this parameter removes steady state errors. Higher I values reduce steady-state error but can slow the response.
Derived (D): The parameter is based upon the change rate in the error to predict future errors. This parameter helps dampening oscillations, and improving stability. Higher D values provide more damping, but can make the response less sensitive.
Note: To tune the PID parameter, you must have a thorough understanding of both the PID algorithm and the system. This manual does not cover detailed tuning procedures. However, you can find them in PID control literature.

E. Status Indicators
Display and LEDs show the current status of your system.
LCD display: Displays current temperature and setpoints, as well as mode (heating/cooling) and active alarms.
Indicators for LEDs: [Specify each LED's function, e.g. Red LED signifies heating, Green indicates cooling and Yellow indicates alarm].
F. Alarms and faults
To ensure safety, the controller has various alarms as well as fault detection mechanisms.
Alarm for High Temperature: Triggered if the temperature measured exceeds the preset point plus the hysteresis range.
Low temperature alarm: Triggered if the measured temperature drops below the setpoint less the hysteresis bands.
Overload alarm: Triggered if the current draw by the load is greater than the maximum safe operating level.
Fault codes: Display may display specific fault code indicating different problems with the controller.
The display will show the alarm type if an alarm has been triggered. If an alarm is triggered, the display will indicate the type of alarm. For guidance, refer to [Section C.B] of the Troubleshooting Section for common problems.
- A comprehensive guide to PID temperature controllers and SSRs
- Achieving precise thermal regulation with the 220V Digital Temperature Control Kit