


PID Temperature Controller Mounting Guide: DIN Rail, Panel & Surface Methods | Expert
Master PID temperature controller mounting with our step-by-step guide. Learn DIN rail, panel, and surface installation best practices, wiring tips, and troubleshooting for optimal performance.
1. The following is a brief introduction to the topic:
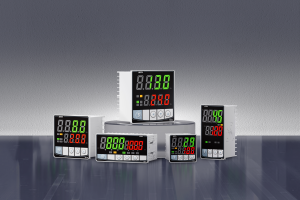
Proper mounting of PID (Proportional-Integral-Derivative) temperature controllers is a critical determinant of system accuracy, operational safety, and device longevity. According to industrial studies, suboptimal mounting practices are responsible for approximately 40% premature failure of controllers (Control Engineering 2023). Precision mounting reduces vibration-induced errors in measurement, provides adequate heat dissipation and eliminates electrical hazards. Modern PID controllers rely on three main mounting methods: panel integration, surface attachment, and DIN rail fixation. This guide, in order to ensure flawless implementation, examines each technique's requirements, including tools and environmental factors.
2. Pre-Installation Checklist
Before mounting is essential, it's important to prepare meticulously. These protocols will prevent electrostatic damage and electrical accidents.
Essential Tools:
DIN rail clips (35mm standard)
Precision Screwdrivers Compliant with ISO 1173 E6.28
The panel-cutting tool (e.g. nibblers, for IP-rated enclosures).
Torque-limiting screwdriver (0.5-0.8 N*m range)
Anti-static wrist band
Safety protocols:
Multimeters (CAT III minimum 1000V) are required to verify all electrical sources.
Use lockout/tagout procedures that comply with OSHA 1920.147.
To dissipate the electrostatic charge, grind down your work surface.
Workspace preparation:
Keep the ambient humidity at or below 60%.
Use rubber damping mats to reduce vibrations.
Remove flammable material within a 3 meter radius.
3. How to Mount a Camera (Step by Step)
A. DIN Rail Mounting (Standard Industrial Practice)
The DIN rail mount, which is governed by IEC 61715, offers modularity and rapid deployment.
Procedure:
Rail Install: Attach a DIN 35mm rail top-hat to the enclosure with M4 screws at 150mm intervals. Keep a minimum of 50mm between the enclosure and any ventilation.
Attach the controller to the rail: Align its rear groove. Press firmly until you hear the clip engage.
Stabilization Use end clamps to stop lateral movement under vibration (such as Phoenix Contact UK 5 N).
Visual Reference: Omega Engineering DIN Rail Tutorial
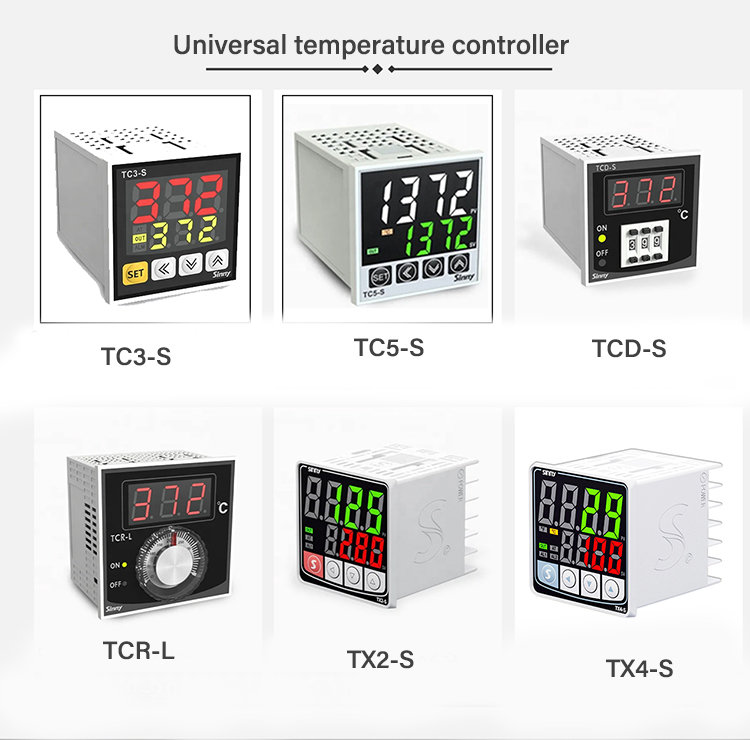
B. Panel Mounting
Ideal for cabinets that require IP54+ protection against ingress.
Procedure:
Fabrication of Cutouts: Make a rectangular opening according to the manufacturer's dimensions (ex. 92.0 x 92.0mm +-0.2mm, for 1/8 DIN Controllers). Edges should be deburred thoroughly.
Control Unit Insertion: Inser the unit through the front of the panel. Use integrated brackets to secure or stainless steel M3.5 screws.
Sealing around the edges of cutouts: Use silicone sealants (NEMA4X) or UL listed sealing putty.
Important Consideration: Check the front panel thickness (typically between 1 and 5mm)
C. C.
Ideal for prototyping and non-industrial environments.
Procedure:
Adhesive method: Use 3M VHB (tm) Tape for locations that are not vibratory.
Fixation mechanical: Drill holes in the wall (O3mm), insert plugs and secure with M4 bolts.
Thermal management: Maintain >=75mm distance from heat sources, such as heaters and transformers.
4. Wiring & Environmental Best Practices
PIDs are 65% less effective when the wiring is incorrect (Process Automation Journal 2022).
Key protocols:
Wire Separation: Segregate power lines (>24VAC/DC), thermocouple/sensor cables by >= 200mm. Sensors should be connected to shielded, twisted pair cables.
Mitigation of EMI: Direct cables at least 500mm away from VFDs or solenoids. Ferrite cores can be installed near the termination points.
Ambient conditions:
Operating temperature: 0-50degC. (derate accuracy above 40degC).
Humidity: <85% non-condensing.
For higher altitudes, please consult the data sheets.
Refer to AutomationDirect EMI Shielding guide
5. Common mounting issues and their troubleshooting
Issue
Root Cause
Resolution
Thermometers that give inaccurate temperatures
Terminals that loosen with vibration
Installation of vibration dampening mounts and torque to 0.6 N*m
Display Fade/Overheating
Inadequate ventilation
Maintain >=50mm clearance; add auxiliary fans (e.g., Orion Fans OD8025-24MB)
Electrical Noise
Ungrounded enclosure
Bond enclosures to Earth Ground (=0.1O Impedance).
Note on Orientation: Mount the controllers +-10deg vertically to avoid convective heating buildup.
6. FAQs (Frequently Asked Question)
Q1 Can outdoor PID controllers be mounted?
You can only use UV-resistant and NEMA 4X/IP66 enclosures. Climate-controlled units are required in most industrial units.
Q2 - What accessories can I use to prevent the vibration of DIN rails?
Use mid-support brackets and end clamps, e.g. ABB 1SFA899901R1000.
Q3 - Is it necessary to ground DIN rail mounting?
Yes. Yes.
7. The conclusion of the article is:
Precision mounting is more than just mechanical fixing. It ensures accuracy in measurement, operational reliability, and compliance with regulatory requirements. Technicians can prevent costly and premature downtime by adhering DIN rail standards and panel sealing protocols. Consult manufacturer documentation for complex installations (e.g. Omron Manual E5CC) or hire certified automation engineers.