


How To Wire A Pid Temperature Controller
The wiring pid temperature controller is the key to ensuring its stability, with interface definition, sensor type, actuator, and planning for operation
1. Clearly define the core components of the system, including the PID controller body, temperature sensor, actuator, and auxiliary parts
2. Some small components are needed: screwdriver, wire stripper, multimeter, wire crimping pliers, insulating tape/heat shrink tubing
3. Confirm the power supply specifications. Generally, they are the conventional AC220V and DC24V. The execution power supply is AC220V and DC12V
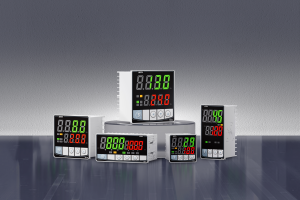
Interface identification of PID temperature controller
![]()
1. Interface type
Generally, there are power interfaces, sensor input interfaces, control output interfaces, alarm interfaces, and communication interfaces
After completing the above preparations, the wiring began
1. Check that the power supply matches
2. The live wire and neutral wire L N should be connected to the L N terminal of the power port. The positive pole (V+) should be connected to "V+", and the negative pole (V-) to "V-". If the controller has a ground terminal (PE), a ground wire (yellow-green wire) should be connected to ensure safety and resist inductive interference
3. Temperature sensor
The sensor is K,J, and outputs millivolt-level voltage signals with positive and negative polarities. Special compensating wires are required. Confirm the interface definition of the sensor. Connect the positive pole of the thermocouple to the controller "T+" and the negative pole to "T-". If the sensor wiring is long, shielded wires are needed

Thermal resistance
Usually, there are :pt100 cu50
Common there are three wire system and four wire, three wire system: "R1" "R2" "R3" or "I +" "I -" U ", "two for incentive thread (" I +" "I -"), a root for signal lines (" U ")
Actuator: Outputs control signals
The Pid controller drives the actuator through the output interface
Controller → relay/SSR wiring
Relay/SSR→ Actuator wiring