


PID Temperature Controller Wiring Diagram 220V: A Detailed Guide
I.
Understanding PID controllers and 220V power is essential for countless applications in industrial, scientific and commercial settings.PID controllers are among the most widely used and effective solutions. They're often combined with Solid State Relays or Contactors. The article below provides an in-depth guide to wiring a 220V PID temperature control. It is important to understand the parts, the wiring procedure, and the safety concerns in order to implement the system successfully. The wiring diagram is a guide that guides the connections of the sensor, controller, load and power source. This guide aims to demystify the process, emphasizing the importance of accuracy, safety, and referring to manufacturer-specific diagrams for precise implementation. This guide will examine the relationship between SSRs/contactors and PID controllers in the context of the 220V common power supply used by many commercial and industrial settings.
II. The Key Components in a PID System for Temperature Control (for 220V).
The success of a PID temperature controller for 220V application depends on the harmonious working together of several components. The first step to proper operation and wiring is understanding the functions of the components.
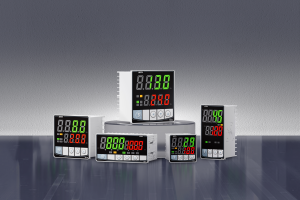
A. PID Controller: Often regarded as the "brain" of the system, the PID (Proportional-Integral-Derivative) controller continuously monitors the process temperature via a temperature sensor. The controller calculates the error between the setpoint temperature desired and the temperature actually measured. The PID controller calculates an output signal based on the temperature error to determine how much energy should be supplied to the cooling or heating element in order to reduce the error. Intelligence lies in the ability of this controller to dynamically adjust output, taking into account past errors (Integral), current error (Proportional) and rate of error change (Derivative), to accurately achieve and maintain setpoint. The PID controller can generate voltage or current loops, which trigger the last stage of the loop.
B. Temperature sensor: As the "eye" for the system, it is the temperature sensors that accurately measures the temperature. The PID controller receives this measurement. Thermocouples are common (they produce a voltage variation proportional to the temperature, and require compensation for cold junctions), as well as Resistance Temperature Detectors. The sensor to use depends on several factors, including the range of temperature, the accuracy needed, and the application. Sensor signals must match the input terminals on the PID controller.
C. Solid State Relay / Contactor This component is the "muscle", or actuator, of the system. It receives the signal control from the PID Controller and switches the power to the heating element or cooling device. SSRs do this using semiconductors, while contactors use electromagnetic coils. In industrial and commercial applications that use 220V AC, contactors or SSRs are commonly used. It is important to select a device that can handle the voltage of 220V and the amount of current drawn by the load. The PID will provide a control signal (e.g. 0-10V or 4-20mA) and this is dependent on the voltage of the 220V line, the current draw by the load, etc. SSRs have advantages over mechanical contactors, such as a longer life (no moving components), higher switching speeds, quieter operations, and less electrical noise. They can, however, be susceptible to voltage and heat transients. This requires proper heat sinking.
Power Supply: Typically, each component of the system requires its dedicated power supply. The temperature sensor and PID controller (if they require external power like certain RTDs, digital sensors, or other devices) operate with low voltage DC. Load (heating element), requires main AC 220V supply. SSRs or contacts act as interfaces, managing the AC 220V power and being controlled by the low-voltage signals from the PID.
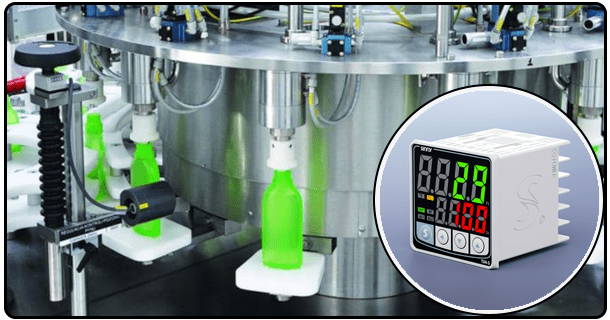
The load is the element to be controlled by the system. Electric heaters are examples, as well as immersion tanks, resistance coils, furnaces or cooling coils. Loads must match the voltage and switching mechanism of the SSR (or contactor).
F. Included keywords: Components of a PID Temperature Controller, SSR 220V, thermocouple RTD, loop 0-10V, contactor power supply, heater element, thermostat control system.
III. Understand Basic 220V Electrical Concepts
Understanding the basic principles of electrical safety and how to work with AC 220V power is essential. This guide is primarily focused on wiring the PID Controller and associated components. However, understanding these concepts for safe implementation and correct use are essential.
A. The simple explanation for a 220V AC is that it consists of two phases (often called "live" or hot" wires), and one neutral wire. It is estimated that the potential difference between two live wires will be approximately 220 Volts. It may be possible to connect a wire between the live and ground wires in some residential single phase settings. The neutral wire completes the electrical circuit and is the wire that carries current. The ground wires are vital for safety as they provide a route for fault currents. They also prevent electric shocks by connecting electrical equipment's metal chassis to the earth.
B. It is impossible to overstate the importance of grounding in an electrical system that uses 220V. The grounding system protects the user from electric shocks by providing an earth path with low resistance for any fault currents. Grounding also protects equipment, stabilizing voltage and serving as a reference. According to the local standards and codes, all metal enclosures of the PID control, the SSR/contactor and the load must be grounded.
C. Electrical symbols that are used to show different connections and components in wiring diagrams. These symbols make it easier to interpret diagrams (e.g. a circle represents a terminal; a triangle represents a load; lines represent wires and a grounding sign). A 'L" often indicates the active terminal. Similarly, the 'N", the neutral terminal. The 'COM,' is the common terminal of an SSR, or contactor. And the triangle, often, represents the load or heating element.
This overview is intended to provide general information. Each device has its own terminal requirements and layout (PID Controller, SSR/Contactor, Sensor). Consult the documentation of the equipment's manufacturer for exact instructions and wiring diagrams
Included keywords: ** 220V Wiring Basics, Live wire, Neutral wire, Ground wire, Electrical symbols, Single-phase Supply, Three-phase Supply, Electrical Safety.
IV. PID temperature controller 220V wiring diagram
When installing a PID system that uses 220V, a wiring diagram can be incredibly helpful. The diagram shows how the various components are connected and the routes of the power, signal, and ground cables. The visual guide prevents errors that could cause equipment damage and safety hazards.
A. It is important to have a clear, accurate and detailed wiring diagram for the installation of electrical control systems. The wiring diagram acts as a blueprint and shows the connections between PID controllers, temperature sensors, SSR/contactors, loads, and power supplies.
B. Source Recommendation : You must obtain the wiring diagrams from the manufacturers of both the SSR or contactor and PID controller. The diagrams will be tailored for the specific specifications of your equipment and the terminal configurations. They provide accurate and reliable information.
The general structure of an example diagram (illustrative). Diagrams can vary but they usually include these elements.
1. Connectors for Power Supplies:
220V Main Supply: Displays the connection of live (L1,L2) and neutral wires (N) from the main supply to the input terminals on the SSR/contactor. The diagram will show how the heat element (load) is connected to the SSR/contactor's output terminals. This diagram shows the current and voltage ratings of this circuit.
Power for the Controller and Sensor: Shows how to connect a separate DC low voltage power supply, if needed, at the input terminals (of the PID control and possibly the temperature sensor). There are clear markings for the voltage (if it is DC) and polarity.
2. Sensor connection to PID controller: Details the connections between the thermocouple/RTD input terminals and the sensor leads. This may include the connections of any sensor extension cables and signal conditioners.
3. Connection of PID Controller's Output to SSR/Contactor Input Control: This diagram shows the connections between the control output signals from the PID controller (e.g. 0-10V output voltage, 4-20mA loop current output), and the control input terminals (e.g. V_in+ or V_in_, analog input terminals, etc.) on the SSR/contactor. This diagram indicates the range and type of control signal that the SSR/contactor expects.
4. Connection of Load: Shows the connections between output terminals (i.e. Common terminal and normally open terminals) for 220V AC loads (heating elements).
5. Connections for Grounding: Mark all the points which require grounding. These include the ground terminals of the power supply main, the chassis of the PID control, the case of the SSR/contactor and possibly the ground connection for the temperature sensor. This diagram is used to ensure that the grounding paths are complete throughout the entire system.
The importance of labeling terminals. A good diagram will clearly identify all terminals. It is important to understand these symbols and designations in order to make the right connections. Connecting the live wire at the wrong terminal can cause insulation to melt or a short-circuit. Incorrect control signal wiring may prevent system operation.
E. Keyword inclusion:** PID temperature controller wiring diagram 220V, 220V wiring diagram, specific wiring, component connections, power wiring, control wiring, grounding diagram, terminal labels.
V. The Wiring Guide: A Step-byStep Process
A general guide that outlines the steps can be helpful in the process of wiring. While it is important to always check the connections against the diagram provided by the manufacturer, an overall step-by-step procedure will provide the framework. The safety of the wiring process must always be the highest priority.
A. Safety first!
B. Collect Components and Tools: Make sure you have the following: the PID Controller, SSR/contactor that is rated to handle the load, and has 220V of power; the Temperature Sensor, appropriate wire lengths and gauges, terminals and wire connectors (e.g. screw terminals and spring-cage connectors); a multimeter (for verification), wire strippers (if using connectors with crimps), heat shrink tubing (for strain
C. Prepare Wires and Connectors. Remove the insulation at the wire ends, usually 6-8mm. The stripped ends of the wires should be crimped onto connectors and terminals. Make sure the insulation has been removed and that the crimping is complete. When using screw terminals or wire nuts, make sure the wires have been inserted completely and that the connector has been tightened. Heat shrink tubing can be used on connectors to add additional mechanical and insulation protection.
Connect power supplies:
1. 220V Main Supply to SSR/Contactor Connect live wires (L1,L2) from the source of 220V to the input terminals designated on the SSR/contactor as shown in the wiring diagram. Connect the neutral wire (N) to the neutral terminal of the SSR/contactor. SSR/contactor voltage and current ratings must be suitable for your load.
2. Connection of Load: Connect the terminals of the heating elements (or any other load that is 220V) to the output terminals on the SSR/contactor. (Example, Common Terminal and Normally Open for simple control on/off). Make sure the gauge of the wire is matched with the current load.
3. Power for the Controller and Sensor: Connecting the output from the DC low voltage power supply (if needed) to the input terminals of the PID control and sensor, ensuring that the polarity is correct (positive towards positive and negative toward negative). Verify that the voltage is appropriate for the sensor and controller.
Connect temperature sensor: Connect leads of the temperature sensors to designated input terminals in the PID controller.
F. Connect SSR/Contactor Input Control to PID Output: Connect control signal wires from the PID controller to designated input terminals of the SSR/contactor. Again, follow the wiring diagram exactly. The SSR/contactor will then act on the decision made by the PID controller.
G. Earthing: Connect the grounding points identified. The ground terminal on the power supply (220V), the PID ground wire (if necessary), the SSR/contactor ground connection, and any sensor ground terminal (if needed) are all connected to one common grounding connection, usually the earth connection of the system. As per the electrical code, ensure that you have a secure and proper grounding.
VI. Take Care When Working With 220V
There are inherent dangers when working with electrical systems that operate at 220V. It is essential to adhere to safety protocol to avoid injury, damage to equipment, and fire.
A. Repeat that the 220V AC voltage can cause a fatal electric shock. Do not turn off the power until you have verified that all components are dead. Electrical hazards must be understood.
B. Check all connections twice before you restore power. Tight connections may cause equipment failure, overheating or arcing. Make sure that the wires have been inserted into the terminals fully and are tightened according to torque specifications. Verify connections with a multimeter before the final power up.
C. Select the wire gauge that is appropriate to the current maximum the load can draw. Wires too thin may overheat, posing a potential fire risk. For minimum recommended wire gauges, refer to SSR/contactor specs and electrical codes.
D. Make sure all connections are adequately insulated. Heat shrink tubing can be used on terminals and splices to help prevent short-circuits. It is important to manage cables properly in order to prevent straining of connections or contact with potentially live components.
E. Incorporate fuses or breakers in the 220V main load circuit. They provide protection from overloads and circuit shorts by automatically cutting off the electricity if it exceeds the safe limit. This protects both the load as well as the wiring.
F. Under no circumstances should you work on a live circuit. When a system malfunctions, it is important to always disconnect power at its main source.
Included keywords: ** 220V Safety, Electrical Safety, Working with 220V Wire Gauge, Overload Protection, Circuit Breaker, Electrical Hazards, Live Circuits.
VII. Test the system
The system's functionality can be verified once the wiring has been completed and the safety tests have passed.
A. Restarting the system: Replace the circuit breaker with care. Monitor the system as soon as power is applied. Look for unusual behavior, including sparks, smells or excessive heat at all connection points.
B. Checking Connections: Inspect the system visually again. Verify that the connections have not been disturbed, are tight and secure. Verify that no errors are displayed on the PID control's screen when it powers up.
C. Monitor Initial Readings: Watch the temperature shown by the PID Controller. The PID controller should display the actual measured temperature, also known as the Process Variable (or PV), and it should be no different than the initial ambient temperature. Check that the sensor works properly.
D. Verifying Control Signal: In the case of a system that uses an indicator, such as an LED to show the heating/cooling state, or analog outputs, check whether the PID controller provides the SSR with the expected signal (0-10V) or (4-20mA). This ensures that the PID controller is correctly calculating the signal and delivering it. Multimeters can be used for measuring the voltage and current of the SSR control input.
E. Setting Temperature Gradually: Set the temperature on the controller PID with care. Watch how the system reacts. Watch the PID controller for temperature displays. When the temperature is below the preset point, the heating element will activate and then deactivate. System should operate without oscillations. Observe similar behavior, but with cooling activated when temperature is above setpoint.
VIII. Troubleshooting common issues
Even when planning carefully, problems can still arise. Saving time by understanding common problems can help you avoid frustration.
A. Heating or Cooling Does Not Respond: The heating element or cooling system may not react as you expect because the power is not being received, there is no control signal, or the switch device is defective.Article: PID Temperature Controller Wiring Diagram 220V: A Detailed Guide
I. Understanding PID controllers and 220V power is essential for countless applications in industrial, scientific and commercial settings. For product quality and process efficiency to be maintained, as well as safety and reliability, it is important that temperatures are kept precise and constant. In order to achieve such a level of control sophisticated systems are used. PID controllers are among the most widely used and effective solutions. They're often combined with Solid State Relays or Contactors. The article below provides an in-depth guide to wiring a 220V PID temperature control. It is important to understand the parts, the wiring procedure, and the safety concerns in order to implement the system successfully. The wiring diagram is a guide that guides the connections of the sensor, controller, load and power source. This guide aims to demystify the process, emphasizing the importance of accuracy, safety, and referring to manufacturer-specific diagrams for precise implementation. This guide will examine the relationship between SSRs/contactors and PID controllers in the context of the 220V common power supply used by many commercial and industrial settings.
II. The Key Components in a PID System for Temperature Control (for 220V).
The success of a PID temperature controller for 220V application depends on the harmonious working together of several components. The first step to proper operation and wiring is understanding the functions of the components.
A. PID Controller: Often regarded as the "brain" of the system, the PID (Proportional-Integral-Derivative) controller continuously monitors the process temperature via a temperature sensor. The controller calculates the error between the setpoint temperature desired and the temperature actually measured. The PID controller calculates an output signal based on the temperature error to determine how much energy should be supplied to the cooling or heating element in order to reduce the error. Intelligence lies in the ability of this controller to dynamically adjust output, taking into account past errors (Integral), current error (Proportional) and rate of error change (Derivative), to accurately achieve and maintain setpoint. The PID controller can generate voltage or current loops, which trigger the last stage of the loop.
B. Temperature sensor: As the "eye" for the system, it is the temperature sensors that accurately measures the temperature. The PID controller receives this measurement. Thermocouples are common (they produce a voltage variation proportional to the temperature, and require compensation for cold junctions), as well as Resistance Temperature Detectors. The sensor to use depends on several factors, including the range of temperature, the accuracy needed, and the application. Sensor signals must match the input terminals on the PID controller.
C. Solid State Relay / Contactor This component is the "muscle", or actuator, of the system. It receives the signal control from the PID Controller and switches the power to the heating element or cooling device. SSRs do this using semiconductors, while contactors use electromagnetic coils. In industrial and commercial applications that use 220V AC, contactors or SSRs are commonly used. It is important to select a device that can handle the voltage of 220V and the amount of current drawn by the load. The PID will provide a control signal (e.g. 0-10V or 4-20mA) and this is dependent on the voltage of the 220V line, the current draw by the load, etc. SSRs have advantages over mechanical contactors, such as a longer life (no moving components), higher switching speeds, quieter operations, and less electrical noise. They can, however, be susceptible to voltage and heat transients. This requires proper heat sinking.
Power Supply: Typically, each component of the system requires its dedicated power supply. The temperature sensor and PID controller (if they require external power like certain RTDs, digital sensors, or other devices) operate with low voltage DC. Load (heating element), requires main AC 220V supply. SSRs or contacts act as interfaces, managing the AC 220V power and being controlled by the low-voltage signals from the PID.
The load is the element to be controlled by the system. Electric heaters are examples, as well as immersion tanks, resistance coils, furnaces or cooling coils. Loads must match the voltage and switching mechanism of the SSR (or contactor).
F. Included keywords: Components of a PID Temperature Controller, SSR 220V, thermocouple RTD, loop 0-10V, contactor power supply, heater element, thermostat control system.
III. Understand Basic 220V Electrical Concepts
Understanding the basic principles of electrical safety and how to work with AC 220V power is essential. This guide is primarily focused on wiring the PID Controller and associated components. However, understanding these concepts for safe implementation and correct use are essential.
A. The simple explanation for a 220V AC is that it consists of two phases (often called "live" or hot" wires), and one neutral wire. It is estimated that the potential difference between two live wires will be approximately 220 Volts. It may be possible to connect a wire between the live and ground wires in some residential single phase settings. The neutral wire completes the electrical circuit and is the wire that carries current. The ground wires are vital for safety as they provide a route for fault currents. They also prevent electric shocks by connecting electrical equipment's metal chassis to the earth.
B. It is impossible to overstate the importance of grounding in an electrical system that uses 220V. The grounding system protects the user from electric shocks by providing an earth path with low resistance for any fault currents. Grounding also protects equipment, stabilizing voltage and serving as a reference. According to the local standards and codes, all metal enclosures of the PID control, the SSR/contactor and the load must be grounded.
C. Electrical symbols that are used to show different connections and components in wiring diagrams. These symbols make it easier to interpret diagrams (e.g. a circle represents a terminal; a triangle represents a load; lines represent wires and a grounding sign). A 'L" often indicates the active terminal. Similarly, the 'N", the neutral terminal. The 'COM,' is the common terminal of an SSR, or contactor. And the triangle, often, represents the load or heating element.
This overview is intended to provide general information. Each device has its own terminal requirements and layout (PID Controller, SSR/Contactor, Sensor). Consult the documentation of the equipment's manufacturer for exact instructions and wiring diagrams. Refer to the diagrams for any system you are wiring and make sure that all safety measures and knowledge is in place.
Included keywords: ** 220V Wiring Basics, Live wire, Neutral wire, Ground wire, Electrical symbols, Single-phase Supply, Three-phase Supply, Electrical Safety.
IV. PID temperature controller 220V wiring diagram
When installing a PID system that uses 220V, a wiring diagram can be incredibly helpful. The diagram shows how the various components are connected and the routes of the power, signal, and ground cables. The visual guide prevents errors that could cause equipment damage and safety hazards.
A. It is important to have a clear, accurate and detailed wiring diagram for the installation of electrical control systems. The wiring diagram acts as a blueprint and shows the connections between PID controllers, temperature sensors, SSR/contactors, loads, and power supplies.
B. Source Recommendation : You must obtain the wiring diagrams from the manufacturers of both the SSR or contactor and PID controller. The diagrams will be tailored for the specific specifications of your equipment and the terminal configurations. Many reputable manufacturer's websites offer technical documentation such as datasheets and installation instructions. It is highly recommended to consult an electrician who has experience in industrial control system, or one with a background in electrical engineering. This is especially important for complicated systems and when you are working in a hazardous environment. They provide accurate and reliable information.
The general structure of an example diagram (illustrative). Diagrams can vary but they usually include these elements.
1. Connectors for Power Supplies:
220V Main Supply: Displays the connection of live (L1,L2) and neutral wires (N) from the main supply to the input terminals on the SSR/contactor. The diagram will show how the heat element (load) is connected to the SSR/contactor's output terminals. This diagram shows the current and voltage ratings of this circuit.
Power for the Controller and Sensor: Shows how to connect a separate DC low voltage power supply, if needed, at the input terminals (of the PID control and possibly the temperature sensor). There are clear markings for the voltage (if it is DC) and polarity.
2. Sensor connection to PID controller: Details the connections between the thermocouple/RTD input terminals and the sensor leads. This may include the connections of any sensor extension cables and signal conditioners.
3. Connection of PID Controller's Output to SSR/Contactor Input Control: This diagram shows the connections between the control output signals from the PID controller (e.g. 0-10V output voltage, 4-20mA loop current output), and the control input terminals (e.g. V_in+ or V_in_, analog input terminals, etc.) on the SSR/contactor. This diagram indicates the range and type of control signal that the SSR/contactor expects.
4. Connection of Load: Shows the connections between output terminals (i.e. Common terminal and normally open terminals) for 220V AC loads (heating elements).
5. Connections for Grounding: Mark all the points which require grounding. These include the ground terminals of the power supply main, the chassis of the PID control, the case of the SSR/contactor and possibly the ground connection for the temperature sensor. This diagram is used to ensure that the grounding paths are complete throughout the entire system.
The importance of labeling terminals. A good diagram will clearly identify all terminals. It is important to understand these symbols and designations in order to make the right connections. Connecting the live wire at the wrong terminal can cause insulation to melt or a short-circuit. Incorrect control signal wiring may prevent system operation.
E. Keyword inclusion:** PID temperature controller wiring diagram 220V, 220V wiring diagram, specific wiring, component connections, power wiring, control wiring, grounding diagram, terminal labels.
V. The Wiring Guide: A Step-byStep Process
A general guide that outlines the steps can be helpful in the process of wiring. While it is important to always check the connections against the diagram provided by the manufacturer, an overall step-by-step procedure will provide the framework. The safety of the wiring process must always be the highest priority.
A. Safety first! Turn off the circuit breaker before touching wires, components or other electrical equipment. A calibrated voltage test can be used to verify that no voltage is present on wires or connectors. Wear appropriate PPE, such as safety glasses and insulated gloves. You should seek the help of a licensed electrical contractor if you do not have any experience in this field. It is hazardous to work with electricity at 220V and only those with sufficient knowledge and skills should do so.
B. Collect Components and Tools: Make sure you have the following: the PID Controller, SSR/contactor that is rated to handle the load, and has 220V of power; the Temperature Sensor, appropriate wire lengths and gauges, terminals and wire connectors (e.g. screw terminals and spring-cage connectors); a multimeter (for verification), wire strippers (if using connectors with crimps), heat shrink tubing (for strain
C. Prepare Wires and Connectors. Remove the insulation at the wire ends, usually 6-8mm. The stripped ends of the wires should be crimped onto connectors and terminals. Make sure the insulation has been removed and that the crimping is complete. When using screw terminals or wire nuts, make sure the wires have been inserted completely and that the connector has been tightened. Heat shrink tubing can be used on connectors to add additional mechanical and insulation protection.
Connect power supplies:
1. 220V Main Supply to SSR/Contactor Connect live wires (L1,L2) from the source of 220V to the input terminals designated on the SSR/contactor as shown in the wiring diagram. Connect the neutral wire (N) to the neutral terminal of the SSR/contactor. SSR/contactor voltage and current ratings must be suitable for your load.
2. Connection of Load: Connect the terminals of the heating elements (or any other load that is 220V) to the output terminals on the SSR/contactor. (Example, Common Terminal and Normally Open for simple control on/off). Make sure the gauge of the wire is matched with the current load.
3. Power for the Controller and Sensor: Connecting the output from the DC low voltage power supply (if needed) to the input terminals of the PID control and sensor, ensuring that the polarity is correct (positive towards positive and negative toward negative). Verify that the voltage is appropriate for the sensor and controller.
Connect temperature sensor: Connect leads of the temperature sensors to designated input terminals in the PID controller.
F. Connect SSR/Contactor Input Control to PID Output: Connect control signal wires from the PID controller to designated input terminals of the SSR/contactor. Again, follow the wiring diagram exactly. The SSR/contactor will then act on the decision made by the PID controller.
G. Earthing: Connect the grounding points identified. The ground terminal on the power supply (220V), the PID ground wire (if necessary), the SSR/contactor ground connection, and any sensor ground terminal (if needed) are all connected to one common grounding connection, usually the earth connection of the system. As per the electrical code, ensure that you have a secure and proper grounding.
VI. Take Care When Working With 220V
There are inherent dangers when working with electrical systems that operate at 220V. It is essential to adhere to safety protocol to avoid injury, damage to equipment, and fire.
A. Repeat that the 220V AC voltage can cause a fatal electric shock. Do not turn off the power until you have verified that all components are dead. Electrical hazards must be understood.
B. Check all connections twice before you restore power. Tight connections may cause equipment failure, overheating or arcing. Make sure that the wires have been inserted into the terminals fully and are tightened according to torque specifications. Verify connections with a multimeter before the final power up.
C. Select the wire gauge that is appropriate to the current maximum the load can draw. Wires too thin may overheat, posing a potential fire risk. For minimum recommended wire gauges, refer to SSR/contactor specs and electrical codes.
D. Make sure all connections are adequately insulated. Heat shrink tubing can be used on terminals and splices to help prevent short-circuits. It is important to manage cables properly in order to prevent straining of connections or contact with potentially live components.
E. Incorporate fuses or breakers in the 220V main load circuit. They provide protection from overloads and circuit shorts by automatically cutting off the electricity if it exceeds the safe limit. This protects both the load as well as the wiring.
F. Under no circumstances should you work on a live circuit. When a system malfunctions, it is important to always disconnect power at its main source.
Included keywords: ** 220V Safety, Electrical Safety, Working with 220V Wire Gauge, Overload Protection, Circuit Breaker, Electrical Hazards, Live Circuits.
VII. Test the system
The system's functionality can be verified once the wiring has been completed and the safety tests have passed.
A. Restarting the system: Replace the circuit breaker with care. Monitor the system as soon as power is applied. Look for unusual behavior, including sparks, smells or excessive heat at all connection points.
B. Checking Connections: Inspect the system visually again. Verify that the connections have not been disturbed, are tight and secure. Verify that no errors are displayed on the PID control's screen when it powers up.
C. Monitor Initial Readings: Watch the temperature shown by the PID Controller. The PID controller should display the actual measured temperature, also known as the Process Variable (or PV), and it should be no different than the initial ambient temperature. Check that the sensor works properly.
D. Verifying Control Signal: In the case of a system that uses an indicator, such as an LED to show the heating/cooling state, or analog outputs, check whether the PID controller provides the SSR with the expected signal (0-10V) or (4-20mA). This ensures that the PID controller is correctly calculating the signal and delivering it. Multimeters can be used for measuring the voltage and current of the SSR control input.

E. Setting Temperature Gradually: Set the temperature on the controller PID with care. Watch how the system reacts. Watch the PID controller for temperature displays. When the temperature is below the preset point, the heating element will activate and then deactivate. System should operate without oscillations. Observe similar behavior, but with cooling activated when temperature is above setpoint.
VIII. Troubleshooting common issues
Even when planning carefully, problems can still arise. Saving time by understanding common problems can help you avoid frustration.
A. Heating or Cooling Does Not Respond: The heating element or cooling system may not react as you expect because the power is not being received, there is no control signal, or the switch device is defective.
- The PID temperature controller with Ethernet: Benefits and Features
- A comprehensive guide to PID temperature controllers and SSRs